Wall panels have become one of the most widely used interior and exterior finishing systems in modern construction. They are now used across residential homes, commercial buildings, hospitality spaces, bathrooms, retail environments, and renovation projects because they can improve installation efficiency while providing decorative and functional performance.
Modern wall panel systems often involve moisture management, dimensional stability, expansion control, fastening systems, substrate preparation, and long-term maintenance considerations. Even high-quality panels can experience problems such as warping, gaps, loose edges, or surface deformation if the installation process is not handled correctly.
This guide explains the general installation principles used across modern wall panel systems, including wall preparation, layout planning, fastening methods, installation procedures, and common mistakes to avoid.
Understanding Different Wall Panel Installation Systems
Not all wall panels are installed the same way. The installation method depends on the material structure, panel weight, environmental exposure, and project requirements.
In most projects, wall panel systems fall into three main installation categories.
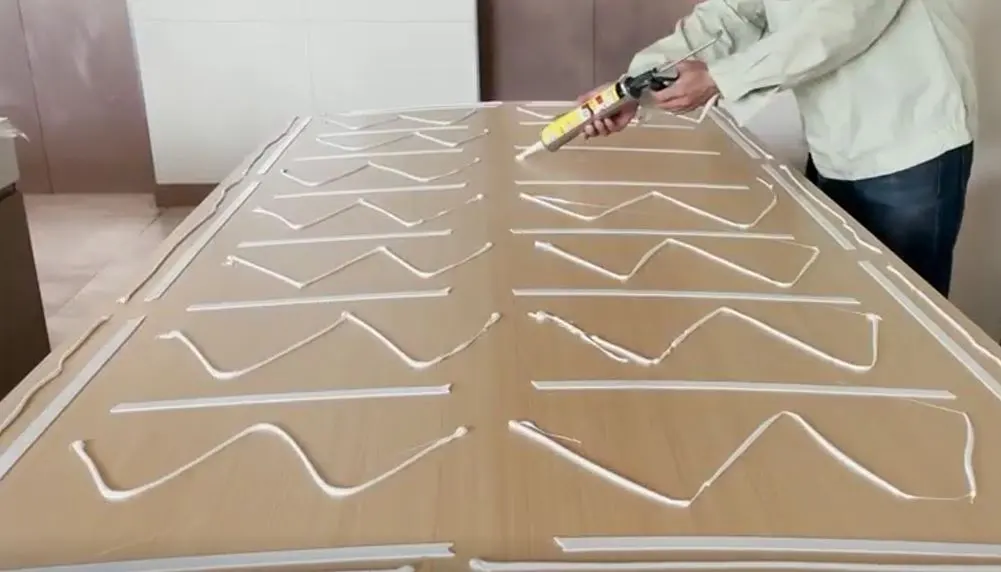
Adhesive Installation Systems
Adhesive-based installation is commonly used for lightweight interior wall panels such as:
- PVC wall panels
- Decorative vinyl panels
- Thin composite panels
- Shower wall panels
This method uses construction adhesive or panel-specific glue to bond the panels directly to the substrate.
Adhesive installation is popular because it is relatively fast and creates a clean finished appearance without visible fasteners. However, the substrate must be flat, dry, and structurally stable. Uneven or damp walls can lead to weak bonding or panel deformation over time.
In wet environments such as bathrooms, waterproof adhesives and mold-resistant sealants are often required.
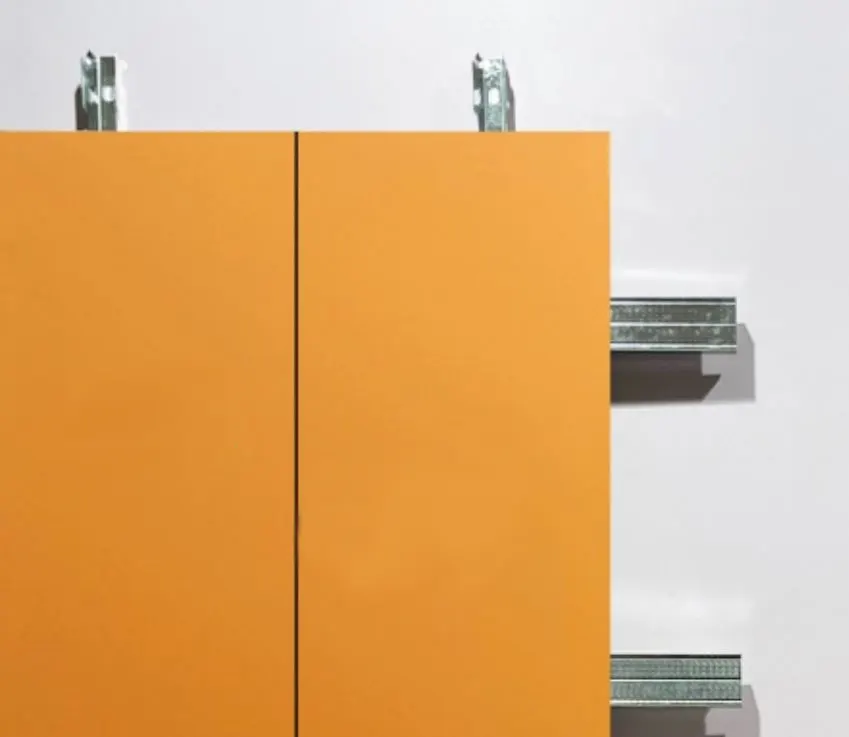
Mechanical Fastening Systems
Mechanical fastening systems use screws, clips, rails, or concealed fixing systems to secure wall panels.
This installation method is commonly used for:
- Slat wall panels
- Acoustic panels
- Exterior cladding panels
- WPC wall systems
- Heavy decorative panels
Mechanical systems are generally more stable for larger panels and allow better ventilation behind the wall surface.
For exterior applications, concealed fastening systems are increasingly popular because they improve appearance while reducing exposed hardware.
Hybrid Installation Systems
Some modern wall panel systems combine adhesives with mechanical fastening.
For example:
- adhesive for surface bonding
- hidden clips or screws for structural reinforcement
Hybrid systems are often used in high-humidity environments or large-format panel installations where both stability and appearance are important.
Wall Preparation Before Installation
Experienced installers often say that wall preparation determines most of the final installation quality.
Many wall panel failures are not caused by the panel material itself, but by poor substrate conditions.
Checking Wall Flatness
The wall surface should be checked carefully before installation.
Uneven walls can create:
- visible gaps
- poor panel alignment
- weak bonding areas
- stress points
Most interior wall panel systems require relatively flat substrates for proper installation.
Minor imperfections can usually be corrected with sanding or filler compounds. Larger uneven areas may require leveling treatment before installation begins.
Moisture and Humidity Control
Moisture is one of the most common causes of wall panel installation problems.
Walls should be completely dry before installation, especially in:
- bathrooms
- basements
- kitchens
- laundry rooms
Excess moisture may lead to:
- adhesive failure
- mold growth
- swelling
- warping
- trapped condensation
In shower areas or wet rooms, waterproofing systems should always be completed before panel installation.
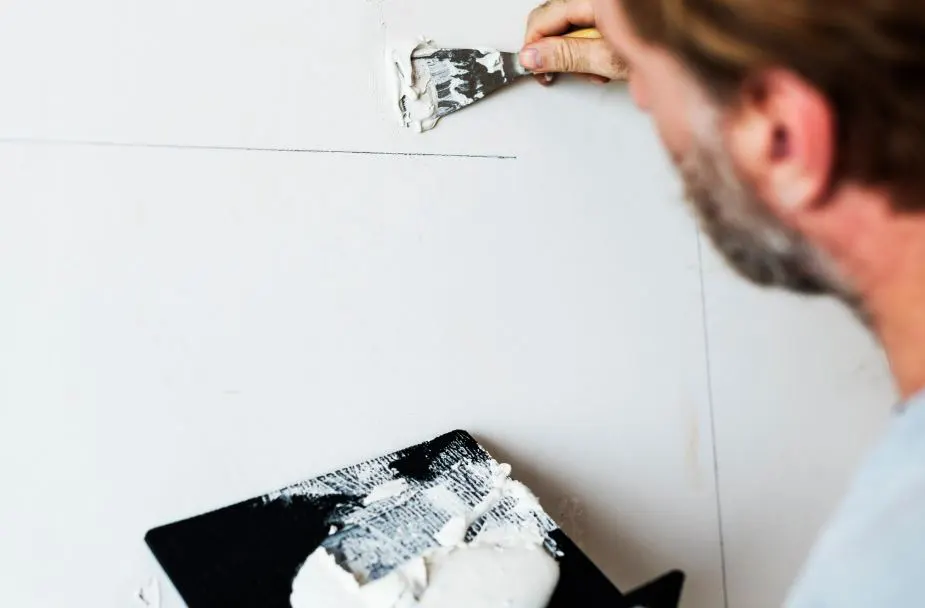
Surface Cleaning and Priming
Dust, grease, loose paint, and construction debris can reduce adhesive performance and installation stability.
Before installation:
- remove dust completely
- clean oil contamination
- repair loose areas
- apply primer if required
Some substrates, especially cement-based surfaces, may require primers or interface agents to improve adhesive bonding.
Repairing Cracks and Damaged Areas
Visible cracks or loose substrate sections should be repaired before installation.
If wall movement or structural cracking is ignored, the finished wall panel surface may eventually show:
- joint separation
- visible stress lines
- loose sections
Stable substrate conditions are essential for long-term performance.
Planning the Wall Panel Layout
Proper layout planning improves both installation efficiency and final appearance.
Professional installers usually spend significant time planning the layout before installing the first panel.
Measuring the Installation Area
Accurate measurements help reduce material waste and avoid narrow edge cuts.
Measurements should include:
- wall height
- wall width
- door openings
- windows
- corners
- electrical outlets
- plumbing penetrations
For large projects, installers often dry-fit several panels before final installation.
Allowing Expansion Gaps
Many wall panel materials expand and contract slightly with temperature and humidity changes.
Expansion gaps help reduce pressure buildup between panels and surrounding structures.
This is especially important for:
- PVC panels
- WPC panels
- composite wall systems
- large-format panels
Ignoring expansion allowances can lead to:
- buckling
- warping
- edge lifting
- joint stress
Planning Corners and Edges
Corners are often the most visually sensitive areas of wall panel installation.
Installers typically plan:
- internal corners
- external corners
- edge trims
- transition profiles
- ceiling terminations
Proper trim selection improves both waterproofing performance and visual consistency.
Horizontal vs Vertical Installation
Wall panels may be installed horizontally or vertically depending on the design intent.
Horizontal installation can visually widen a space.
Vertical installation often makes walls appear taller and may improve drainage performance in some exterior applications.
Some slat wall systems also support diagonal or custom layout configurations.
Common Tools Used for Wall Panel Installation
Although installation methods vary by material, several tools are commonly used across modern wall panel systems.
Typical installation tools include:
- laser level
- measuring tape
- utility knife
- circular saw or jigsaw
- adhesive trowel
- rubber roller
- screw gun
- spacers
- sealant gun
- corner rollers
For shower wall panels or vinyl systems, heat welding tools and silicone finishing tools may also be required.
Step-by-Step Wall Panel Installation Process
The exact process varies depending on material type, but most wall panel installations follow a similar sequence.
Step 1 – Prepare the Wall Surface
The wall should be:
- clean
- dry
- flat
- structurally stable
Any damaged or loose material should be repaired before installation begins.
In wet areas, waterproofing systems should already be completed and fully cured.
Step 2 – Acclimate the Panels
Many wall panel materials should be stored on-site before installation.
Acclimation allows the material to stabilize under actual temperature and humidity conditions.
This is especially important for:
- PVC panels
- WPC wall panels
- composite systems
Panels are often acclimated for at least 24 hours before installation.
Step 3 – Mark Reference Lines
Reference lines help maintain straight alignment throughout the installation.
Professional installers commonly use laser levels or chalk lines to establish:
- vertical alignment
- starting positions
- trim locations
- corner transitions
Starting with a straight first panel is critical because small alignment errors become more visible as installation continues.
Step 4 – Install the First Panel
The first panel is usually installed at the most visible or structurally important starting point.
Depending on the system, installation may involve:
- adhesive bonding
- screws
- clips
- rails
- concealed fasteners
Pressure rollers are often used to improve adhesive contact and remove trapped air.
Step 5 – Continue Panel Alignment
As installation progresses, installers continuously check:
- joint alignment
- panel spacing
- expansion gaps
- corner consistency
For tongue-and-groove systems, panels should lock together without excessive force.
Over-tight installation may restrict natural movement and increase stress.
Step 6 – Finish Corners and Edges
Edge finishing improves both appearance and durability.
Common finishing accessories include:
- internal corner trims
- external corner trims
- L-shaped profiles
- end caps
- transition strips
In wet environments, sealant is often applied around penetrations and perimeter joints.
Step 7 – Clean and Inspect
After installation:
- remove adhesive residue
- clean the surface
- inspect seams
- verify panel stability
Most adhesive-based systems require curing time before full use.
Some projects may require 24–48 hours before exposure to moisture or heavy cleaning.
Installation Differences by Wall Panel Type
Although many wall panel systems follow similar installation principles, different materials still require different construction methods, fastening systems, and environmental considerations.
Understanding these differences helps improve installation quality and long-term performance.
PVC Wall Panel Installation
PVC wall panels are commonly installed using adhesive systems or tongue-and-groove connections. Because PVC materials can expand slightly under temperature changes, installers usually leave expansion gaps around edges and corners.
These panels are widely used in bathrooms, kitchens, and commercial interiors due to their lightweight structure and water resistance.
Slat Wall Panel Installation
Slat wall panels are typically installed using concealed screws, clips, or batten systems. Accurate spacing and alignment are especially important because small inconsistencies are highly visible in slatted designs.
Some acoustic slat systems also require backing material alignment and airflow spacing for proper sound performance.
Shower Wall Panel Installation
Shower wall panel installation focuses heavily on waterproofing and moisture protection. Installers commonly use waterproof adhesives, sealants, and moisture-resistant substrates to help prevent water infiltration behind the panels.
Corner sealing and plumbing penetrations are especially important in wet environments.
WPC Wall Panel Installation
WPC wall panels are commonly installed using subframe systems, hidden clips, or screw fastening systems. Because composite materials respond to temperature changes, proper expansion spacing and ventilation are important.
For exterior applications, drainage and airflow behind the panels also play a major role in long-term stability.
Acoustic Wall Panel Installation
Acoustic wall panels are commonly installed using adhesive systems, mounting clips, Z-clips, or batten structures depending on the panel type and acoustic requirements. Some systems are installed directly onto walls, while others require air gaps or acoustic backing materials to improve sound absorption performance.
Exterior Wall Panel Installation
Exterior wall panel systems must handle UV exposure, rain, temperature fluctuations, and structural movement. Because of this, many exterior systems use ventilated subframes, waterproof membranes, and mechanical fastening systems.
Modern rainscreen installation systems are widely used in commercial and architectural projects to improve moisture management and façade durability.
Common Wall Panel Installation Mistakes
Many wall panel problems develop slowly over time and are often related to installation mistakes rather than material defects.
Installing Panels on Damp Walls
Installing over damp substrates is one of the most common causes of failure.
Moisture trapped behind panels may eventually cause:
- mold growth
- adhesive breakdown
- swelling
- bubbling
- warping
Substrate moisture testing is especially important in:
- bathrooms
- basements
- concrete walls
Ignoring Expansion Gaps
Many installers underestimate thermal movement.
PVC and composite materials naturally expand and contract with temperature changes.
Without expansion gaps, panels may experience:
- edge lifting
- buckling
- surface stress
- joint deformation
Poor Surface Preparation
Uneven walls often lead to visible defects after installation.
Problems may include:
- hollow areas
- weak adhesion
- uneven joints
- visible panel distortion
Proper substrate preparation is one of the most important parts of installation.
Using Incorrect Adhesives
Not all adhesives are compatible with all wall panel materials.
Incorrect adhesives may cause:
- poor bonding
- chemical reactions
- staining
- long curing times
Wet areas usually require waterproof or mold-resistant adhesive systems.
Poor Corner Sealing
Corners and penetrations are common moisture entry points.
In bathrooms or shower areas, improper sealing may eventually lead to hidden moisture damage behind the panels.
Professional installers usually pay close attention to:
- inside corners
- outside corners
- pipe penetrations
- floor-to-wall transitions
Maintenance After Installation
Wall panels generally require less maintenance than many traditional wall finishes, but regular care still helps improve long-term appearance and stability.
Basic maintenance usually includes:
- routine cleaning
- avoiding abrasive chemicals
- inspecting sealants
- checking joints and edges
In wet environments, maintaining proper ventilation is important for reducing long-term moisture buildup.
Exterior wall systems may also require periodic inspection for:
- sealant aging
- loose fasteners
- drainage blockage
- UV-related wear
Different materials have different maintenance requirements, so following manufacturer recommendations is always important.
FAQs
Yes. Many interior wall panels can be installed directly on drywall if the surface is flat, dry, clean, and structurally stable. Heavy panels or exterior systems may still require battens or mechanical fastening systems.
It depends on the panel type and installation environment. Lightweight PVC panels are often glued, while slat panels, acoustic panels, and exterior wall systems commonly use screws, clips, or subframe systems for better stability.
Yes. Many wall panel materials, especially PVC and composite panels, expand and contract slightly with temperature changes. Expansion gaps help reduce the risk of warping, buckling, or joint stress.
In many renovation projects, wall panels can be installed over existing tiles if the tiled surface is stable, well-bonded, clean, and relatively level. However, loose, hollow, cracked, or moisture-damaged tiles should be repaired or removed before installation. If the original tile substrate becomes unstable over time, it may affect the long-term stability of the wall panel system as well.
Walls do not need to be perfectly flawless, but large uneven areas should be repaired before installation. Uneven surfaces may cause visible gaps, weak bonding, or alignment problems.
Some wall panel systems, such as PVC panels and shower wall panels, are highly water-resistant and suitable for wet areas. However, waterproof performance also depends on proper sealing and installation quality.
Yes. Many modern shower wall panels are specifically designed for wet environments. Waterproof adhesives, sealants, and moisture-resistant substrates are usually required for long-term performance.
Gaps may appear due to thermal expansion, poor alignment, insufficient fastening, or improper installation spacing. Correct expansion allowances and proper installation methods help reduce this issue.
Conclusion
Modern wall panel installation is no longer simply about attaching decorative materials to a surface. Proper installation now involves substrate preparation, moisture control, expansion management, fastening systems, and long-term durability planning.
Different wall panel materials require different installation approaches, but the core principles remain consistent: stable substrates, correct spacing, proper sealing, and careful planning all play a major role in long-term performance.
Whether the project involves PVC wall panels, slat panels, shower systems, or exterior cladding, understanding the installation system is just as important as selecting the panel material itself.
For more detailed installation methods for specific panel types, you can also explore our additional wall panel installation guides.
Need help choosing the right wall panel system or installation method for your project? Contact our team at timmy.wu@timotechs.com for professional product and application support.