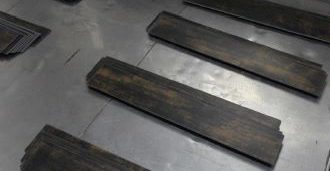
SPC flooring installation refers to the professional process of installing Stone Plastic Composite flooring using a click-lock system over a properly prepared subfloor. Due to its rigid core structure and locking mechanism, SPC flooring is widely used in residential, commercial, and industrial interior projects.
However, the final performance of SPC flooring does not depend only on the material itself. In fact, installation quality directly determines:
- Long-term stability
- Surface flatness
- Joint strength
- Resistance to warping or lifting
Incorrect installation is one of the most common causes of flooring failure in real projects. Therefore, following standardized installation procedures is essential for achieving reliable performance.
Related Articles:
SPC Flooring: Pros, Cons, and Is It the Right Choice for Your Project?
Pre-Installation Requirements for SPC flooring installation
Before starting installation, the subfloor condition must meet strict technical standards. These requirements ensure bonding stability and prevent deformation issues.
1. Subfloor Cleaning Standard
The surface must be:
- Completely clean and free from dust
- Free from adhesive residue or oil stains
- Dry and structurally stable
- Free from loose particles or contamination
A contaminated subfloor is one of the leading causes of SPC flooring lifting and joint failure.
2. Subfloor Strength and Moisture Control
To ensure structural reliability, the following conditions must be met:
- Concrete strength: ≥ C-20 standard
- Surface hardness: ≥ 1.2 MPa
- Moisture content: < 2.5%
If moisture exceeds the limit, it may cause expansion pressure and affect locking system stability.


3. Subfloor Flatness Requirement
Flatness is one of the most critical factors in SPC flooring installation.
- Measurement tool: 2-meter straight edge ruler
- Requirement: deviation must be ≤ 2mm within 2 meters
- No visible cracks, structural defects, or uneven gaps allowed
Uneven surfaces can lead to:
- Joint stress concentration
- Click system damage
- Long-term deformation

4. Environmental Acclimation
Before installation, SPC flooring must be placed in the installation environment for at least 24 hours.
This allows the material to adjust to:
- Temperature conditions
- Humidity levels
- Room pressure balance
Skipping this step may lead to expansion or contraction after installation.
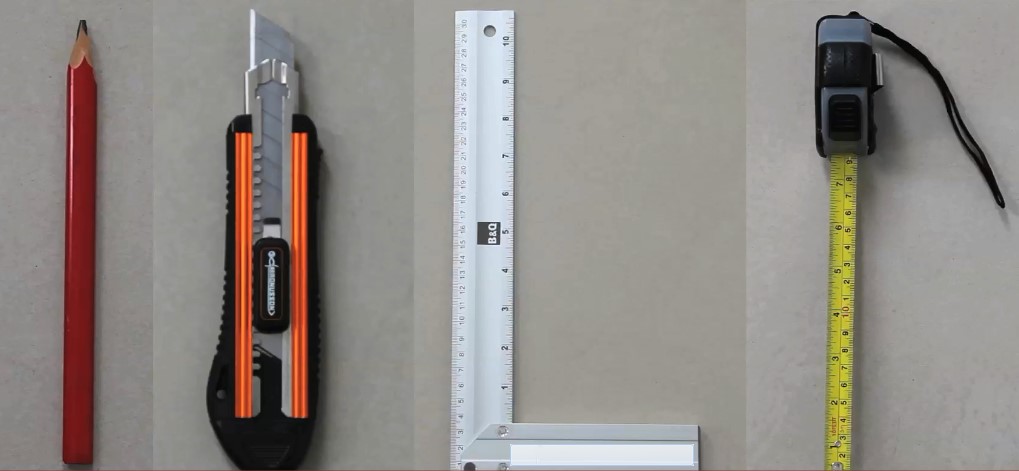
5. Required Installation Tools
Professional SPC flooring installation requires basic tools such as:
- Utility knife (cutting)
- Measuring tape
- Pencil marking tool
- Straight edge or square ruler
- Expansion spacers (8–10mm control)
SPC flooring installation Methods
Step 1: Starting Position and First Row Installation
Installation should always begin from a straight wall.
- Place the first plank tightly along the wall
- Ensure alignment is straight and stable
- Insert the second plank short edge into the first plank groove
- Cut edge pieces can be reused at the start of the next row to reduce waste
This method improves material efficiency and ensures pattern consistency.
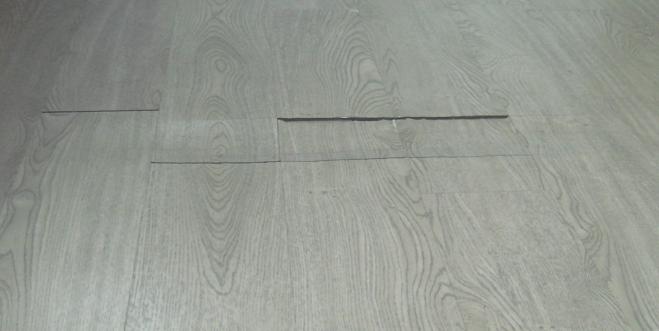
Step 2: Proper Installation Layout Pattern
Correct installation pattern is essential for structural stability.
Recommended patterns:
- Brick pattern
- 1/2 staggered pattern
- 3-6-9 (random staggered system)


❌ Not allowed:
- One-line alignment of short edges (straight joint alignment)

Reason:
Straight alignment weakens locking strength and increases the risk of joint loosening.
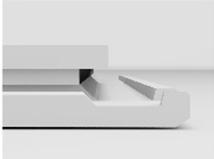
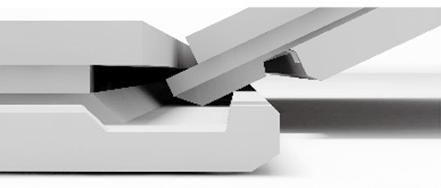
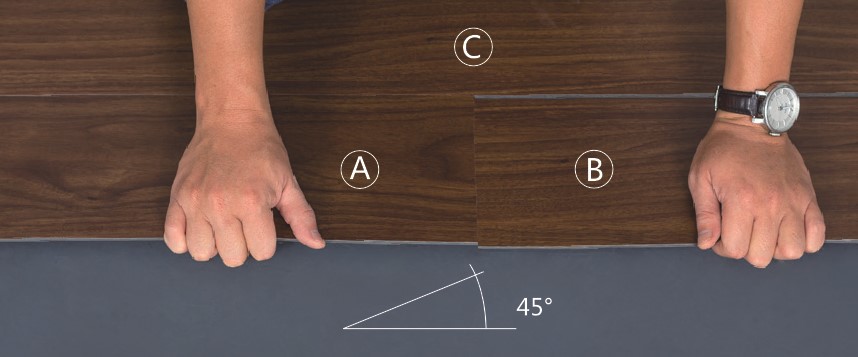
Step 3: Locking System Installation Method
The click system is the core structure of SPC flooring.
Correct procedure:
- Insert tongue into groove at 20°–45° angle
- Lock gently by lowering plank into position
- Ensure a smooth connection without gaps
- Use hand pressure only
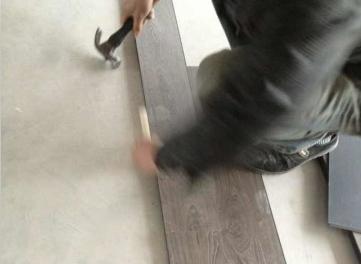
❌ Not allowed:
- Hammering or force impact tools
- Excessive pressure on locking edges
If gaps appear:
- Lift plank slightly (10°–30°)
- Re-align and re-lock properly

Step 4: Expansion Gap Requirements
Proper expansion space ensures long-term stability.
- Expansion gap: 8–10mm
- Required for installations longer than 10 meters
- Recommended maximum area: ≤100㎡ per continuous zone
- For areas >50㎡: expansion joints should be added
This prevents:
- Floor lifting
- Thermal expansion damage
- Structural pressure buildup
Step 5: Installation Temperature Conditions
Temperature plays an important role in SPC flooring installation performance.
Recommended conditions:
- General installation: 10°C–30°C
- Optimal stability range: 20°C–25°C
- Sun-exposed environments require stricter temperature control
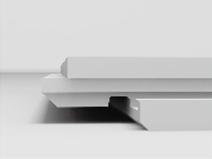
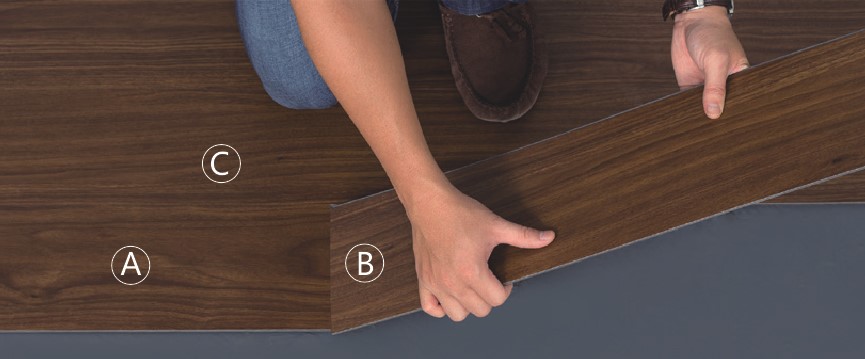
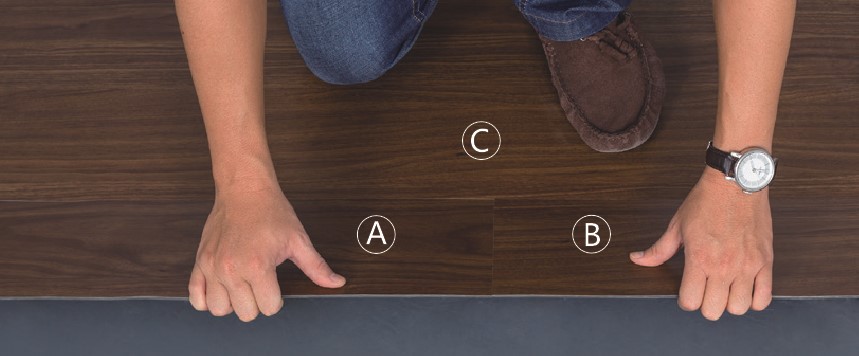
Locking System Operation Process (Technical Detail)
Correct locking sequence ensures tight and durable joints:
- Insert plank B into plank A at an angle
- Maintain a spacing of approximately 2–3mm between planks
- Lift assembled planks to 20°–45° angle
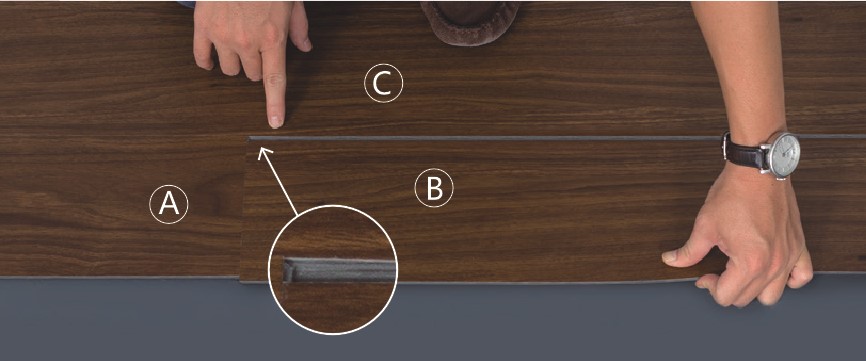
- Push toward adjacent plank (C plank) until fully locked
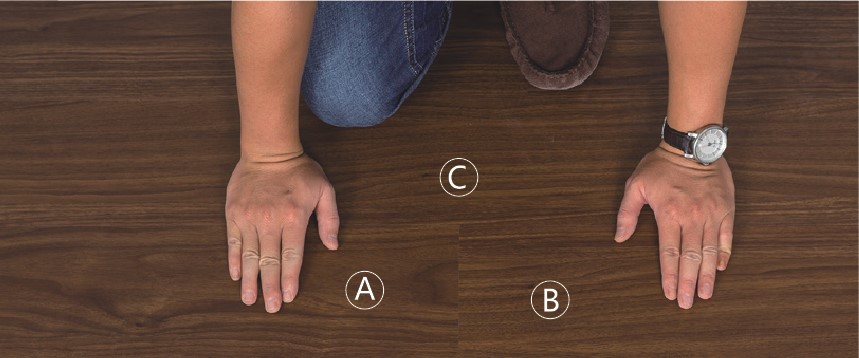
- Press down gently by hand until flat
Key principle:
The floor must naturally self-level after correct locking. Force pressing should be avoided.
Special Cutting and Edge Treatment
1. Wall Corner Cutting
When reaching wall edges:
- Measure accurately with ruler
- Mark cutting line with pencil
- Cut using utility knife
- Reuse remaining material for next row starting point
2. Column and Irregular Shape Cutting
For obstacles such as columns:
- Measure both length and width precisely
- Create template if necessary
- Mark cutting line carefully
- Perform precise cutting before installation
SPC flooring installation Standards for Different Applications
Thickness Selection Guide
- 4.0mm: Residential use
- 5.0mm–6.0mm+: Commercial use
Application Requirements
Based on EN685 usage classification:
- Residential environments require standard load performance
- Commercial environments require higher durability and structural strength
Batch Consistency Control
For large-scale projects:
- Always verify product batch numbers before installation
- Avoid mixing different batches in the same open space
- If necessary, separate installation zones to avoid color variation
Common Problems in SPC flooring installation and Solutions
1. Floor Breakage or Structural Damage
Cause: Uneven subfloor
Solution: Re-check flatness (≤2mm within 2m standard)
2. Edge Lifting or Buckling
Cause: Dust, debris, or contamination under flooring
Solution: Thorough subfloor cleaning before installation


3. Joint Gaps or Loose Locking
Cause: Incorrect installation angle or insufficient acclimation
Solution: Re-adjust temperature and reinstall using correct locking method
4. One-Line Installation Failure
Cause: Incorrect layout pattern
Solution: Use staggered patterns (brick / 3-6-9)

5. Warping or Expansion Issues
Cause: Missing expansion gaps or improper environmental control
Solution: Ensure 8–10mm expansion space and controlled installation temperature
Installation Precautions
To ensure professional SPC flooring installation results, the following precautions must be followed:
- Always read installation instructions before starting
- Use trained installers for commercial projects
- Avoid using hammer or force tools on locking system
- Ensure subfloor compliance before installation
- Verify product specification and batch consistency before use
Conclusion
A successful SPC flooring installation depends on three key factors:
- Strict subfloor preparation
- Correct locking system operation
- Proper environmental and expansion control
When these standards are followed, SPC flooring can deliver stable performance, long service life, and high durability across residential and commercial applications.
For large-scale projects, professional installation guidance and standardized procedures are essential to ensure consistent quality and long-term reliability.
If you are interested in purchasing SPC flooring or need a customized solution for your project, please feel free to contact us at timmy.wu@timotechs.com.
FAQ
SPC flooring installation refers to the process of installing stone plastic composite flooring using a click-lock system over a properly prepared subfloor. It requires strict control of subfloor conditions, installation techniques, and expansion gaps to ensure stable long-term performance.
A proper subfloor is essential for successful installation. The surface must be clean, dry, and structurally stable. Concrete strength should be at least C-20, surface hardness should reach 1.2 MPa or higher, and moisture content must be below 2.5%. In addition, the flatness deviation should not exceed 2mm within a 2-meter range.
Yes, expansion gaps are necessary. During SPC flooring installation, a gap of 8–10mm should be left around the edges of the room to allow natural expansion and contraction. For larger areas over 50㎡, additional expansion joints are recommended to prevent lifting or deformation.
The correct method is to insert the tongue into the groove at an angle of 20–45 degrees, then gently lower the plank into place until it locks securely. Only hand pressure should be used. Hammering or using force tools is not recommended, as it may damage the locking system.
Common mistakes include installing on an uneven subfloor, failing to leave proper expansion gaps, using incorrect installation patterns such as straight alignment, and applying excessive force during locking. These issues can lead to gaps, buckling, or joint failure.
Before installation, SPC flooring should be placed in the installation environment for at least 24 hours. This allows the material to adjust to room temperature and humidity, reducing the risk of expansion or contraction after installation.
Recommended patterns include brick layout, 1/2 staggered installation, and 3-6-9 random staggered patterns. These layouts improve structural stability and help distribute pressure evenly across the flooring system.